Gingerbread Family – the sweetest new digi from Power Poppy!

There’s a new digital stamp coming out for Power Poppy’s Happiest Holidays 2017, and it’s all about the cookies! Meet Gingerbread Family:

preview-full-PPOCT1703D_GingerbreadFamily

This set has unlimited “decorating” potential! Have lots of fun coloring up all that icing, and making a sweet scene with the gingerbread house and ginger folk.  There’s also some great sentiments that can be used on all sorts of gifting and holiday tags and cards.

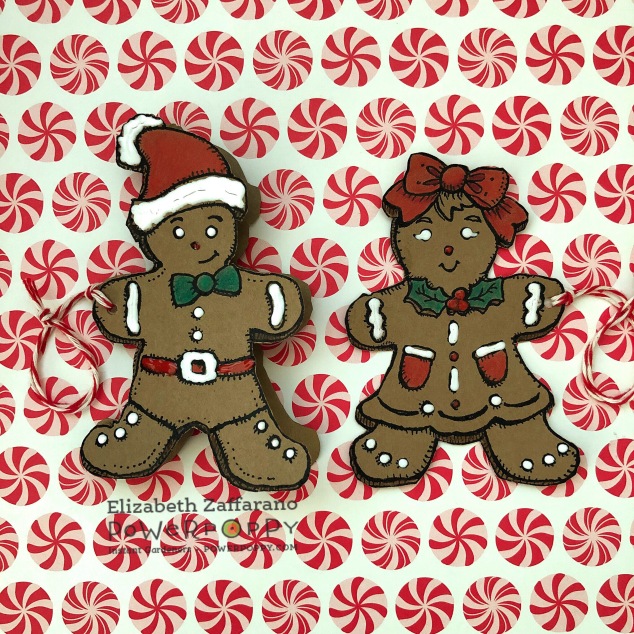
For my post today, I took one look at the gingerbread boy and girl and knew I needed to make some tags! Especially because there’s a back side to each cookie! How fun is that?

final

I copied the images into Pages, and sized each one to about 3″ x 4″ (7.6 cm x 10.2 cm), then printed them on some kraft card stock.  One thing I love about digital stamps is that you can make stuff as small or as big your printer can handle, and this size is perfect for a gift tag, as there’s plenty of room for writing “To” and “From” or even a little note.

Because the images are designed to fit together, I needed to do some fussy cutting. Fortunately, Marcella designed the ginger folk with nice and distinct edges, so running the scissors around was fast and easy (Fact: Each image took me approximately the run time of “Hungry Like the Wolf” by Duran Duran or 3 minutes 40 seconds). If you have one of those digital/scanning electronic cutters, you can make a whole troop of gingerbread tags in a flash (are you listening Santa?).

final

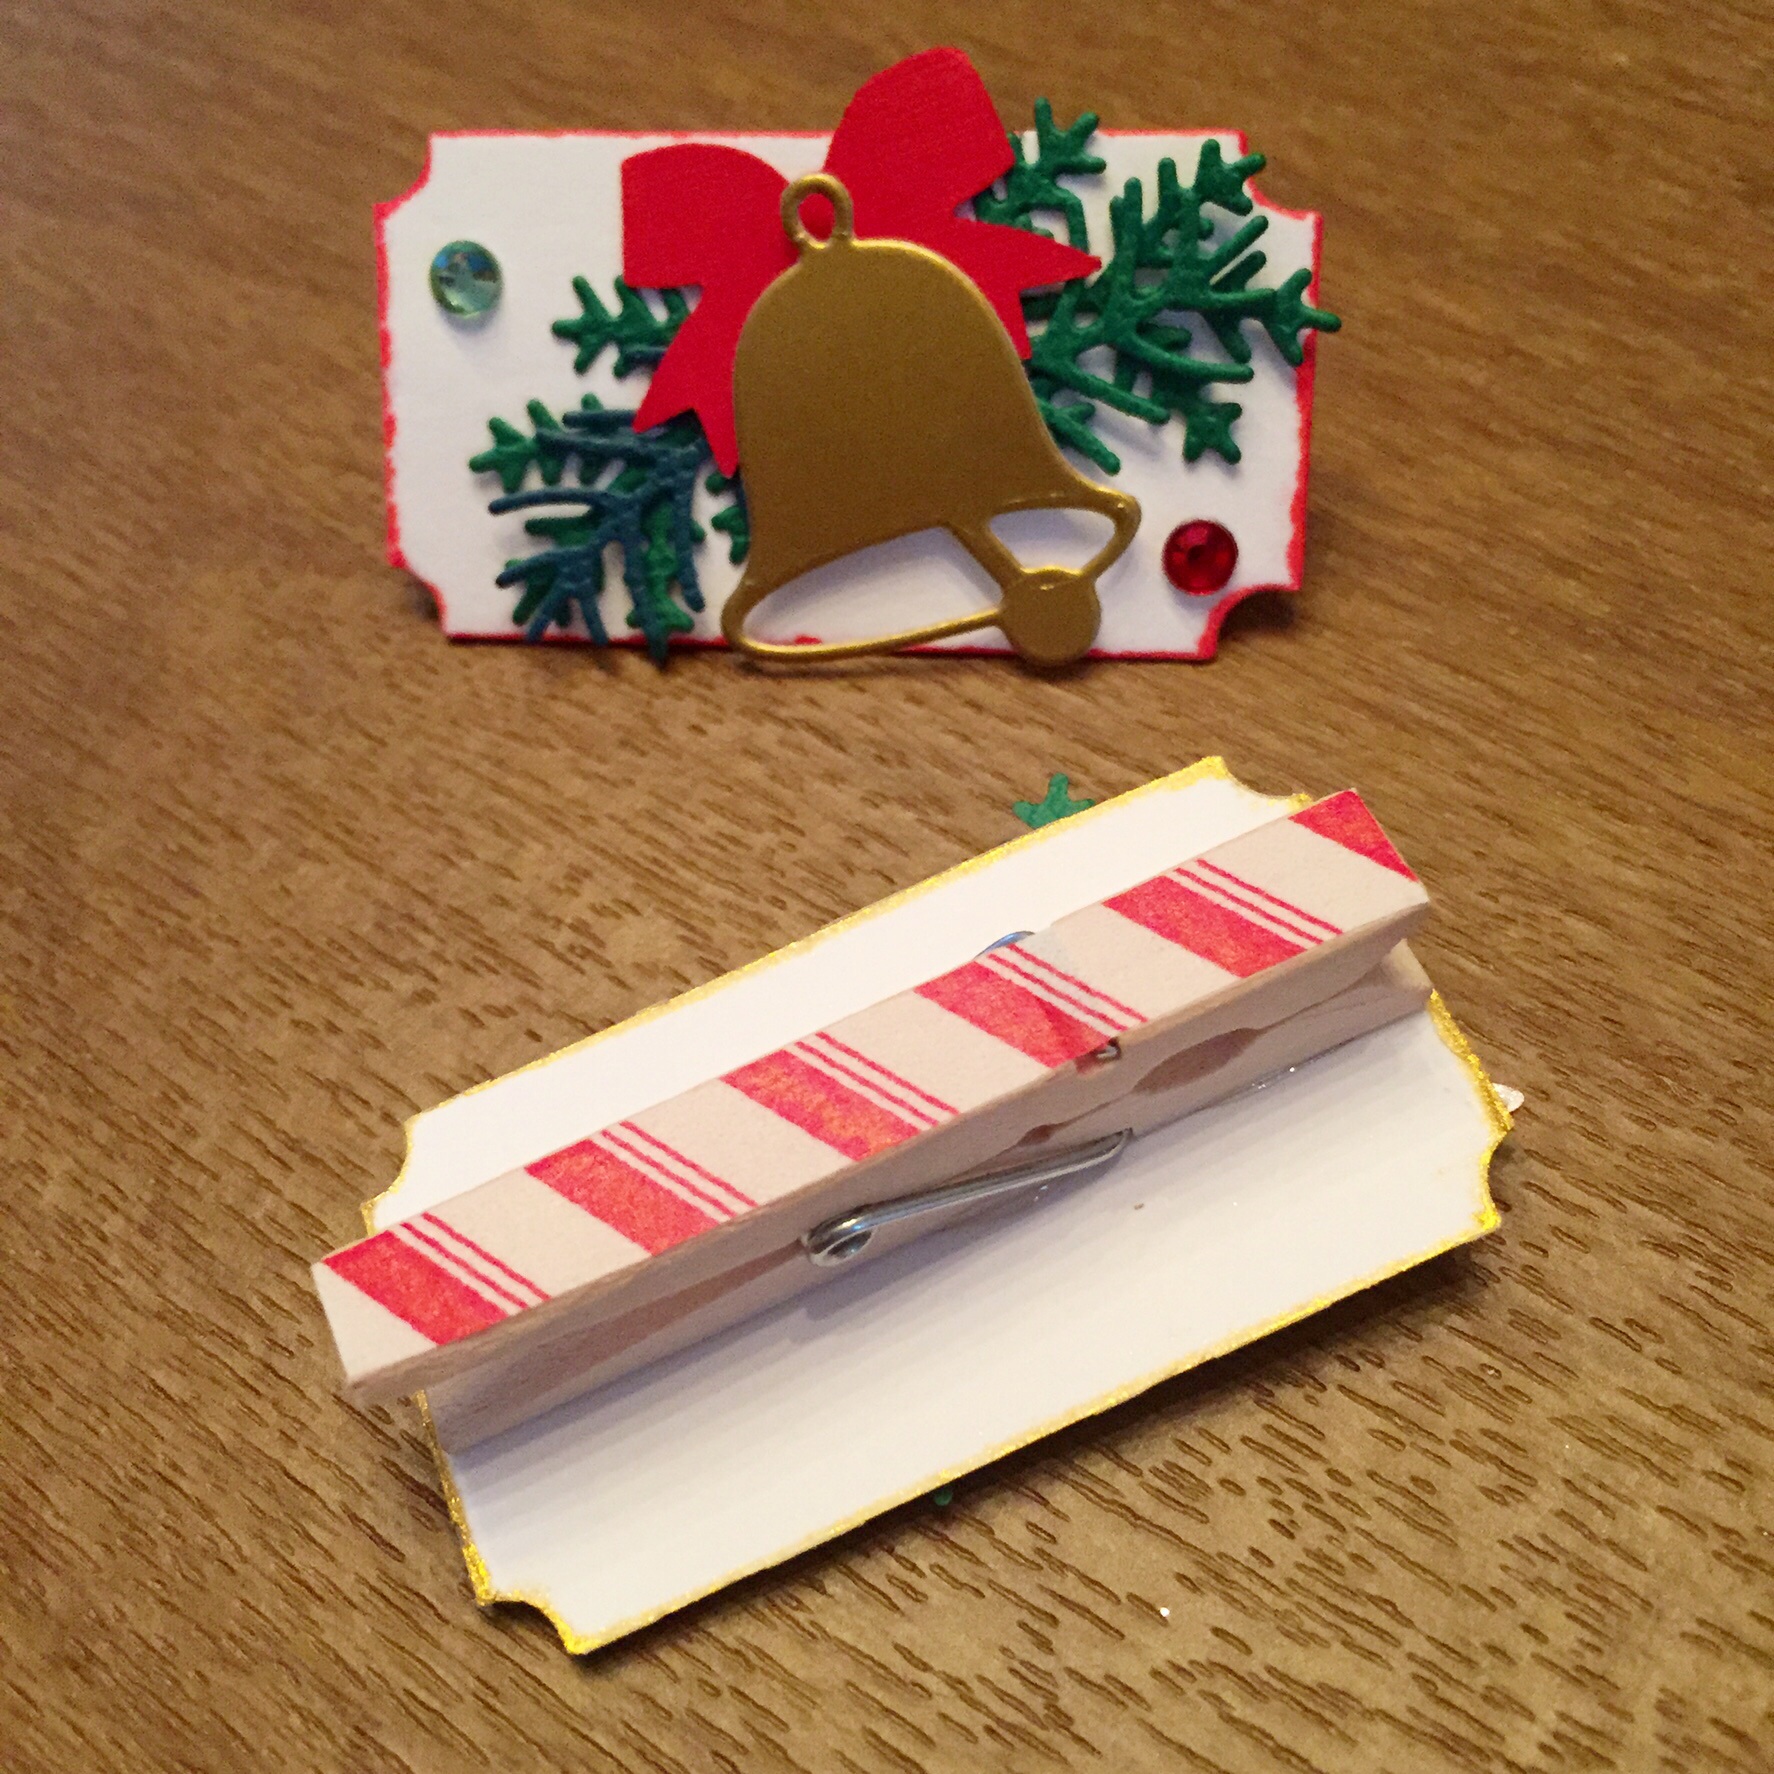
Ever since I heard rumors that a new cookie-themed digi stamp stamp set was in the works, I’ve wanted to try using enamel drops to mimic frosting/icing, and I finally got my chance.  To add decorative details to my ginger people, I tried out the Nuvo Crystal Drops in Gloss White and Red Berry. I love the dimensional look, although you can see that the white cracked a bit: looks like real royal icing to me, but I’m going to blame the incredibly dry heat wave we’ve been having in Southern California as well.  It was 90F in the room when I applied the drops and I think they got a little baked!

I also added a little more color with some pencils.  I chose a darker brown for the cookie edges to give dimension, and scarlet red and emerald green for greenery, bows and bowties. I also used just pencil on the back of the ginger boy, but you could go for dimension on both sides.  I think the pencil looks wonderful and surprisingly bright on top of that brown base.

final-1

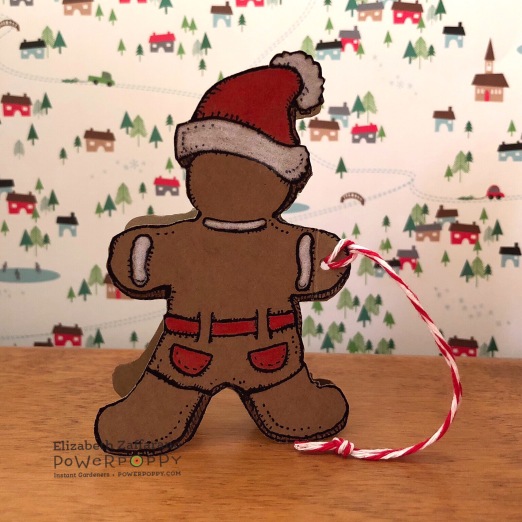
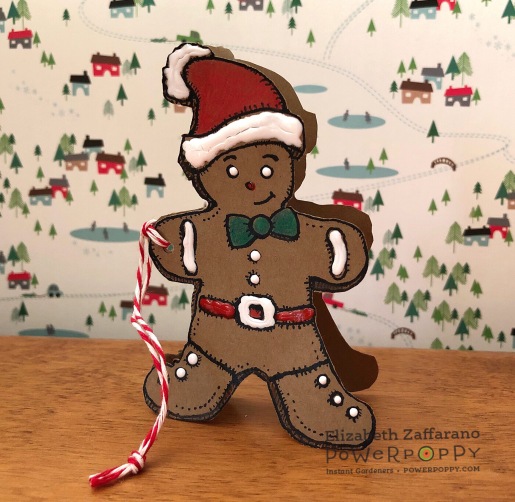
I assembled the ginger boy as a folding tag, tying the string through one of his hands.  I did the same with the ginger girl, although I left as a flat tag. Look at how nicely that ginger boy stands up – I bet these ginger folk would make the cutest placecards for a cookie-decorating party.

Ready to see more sweet ideas from this new holiday digital stamp set?
Nancy
Cheryl
Power Poppy blog


Camelia Tags and a Gift Bag

3 camellia tags

I’m back with some more tags. Previously, the Power Poppy blog has inspired me to deconstruct those gorgeous floral images, and it may be my favorite twist on the usual stamped and colored card.  This time, I printed and colored the Camellias digi stamp.  I was experimenting with shading some acid green leaves, and the finished image turned out *really* vivid!

purple camellias full image

I decided that maybe the flowers would be most effective in small doses, so I die cut a slew of tags. I backed all of them with lavender card stock, and then stamped and heat-embossed small sentiments on each. Several of the Power Poppy stamp sets have a perfect, tiny “For You” that’s just perfect for a gift tag.

several camellia tags

My newly-crafted tags inspired me to make this little gift bag for my friend Dani, who gifted me a couple of ink pads.

camellias gift bag

I cut the bag pieces from card stock that is a much brighter light green in real life! Then I die cut a butterfly, outlined the shape with stickles, added some acetate for backing, and assembled the bag.

gift bag lawn fawn die

I filled it with some Speculoos-filled chocolate cups from Trader Joes, and tied the top with some lavender seam binding.  I tied my tags together with twine and then attached them to the bag. I think it looks very springy!

camellias gift bag close up


Supplies:

Power Poppy Camellias digital stamp
Copic Markers
Avery Elle tag die: Simply Tags
Simon Says Stamp tag die: Tiny Tags
Lawn Fawn Treat Bag die
Hero Arts butterfly die: Antique Butterflies & Flowers Framelits
Paper Source Lavender card stock and twine

It’s Never Too Late For Tags!

Bells tag

Hi there! I had grand plans to write several blog posts about my Christmas crafting, but then I caught a bug over Thanksgiving that has really thrown a wrench into those plans! However, I’ve really enjoyed making all sorts of tags this season, and I thought I’d share those with you.

3 tags

The tag on the left is my take on the chalkboard trend. I heat embossed (with white powder) a sentiment from Power Poppy’s Joyful Arrangement Stamp set onto a a die-cut tag from Papertrey Ink.  I couldn’t believe how perfectly everything fit! I added some sweet greenery cut  with Impression Obsession dies. The candy-striped twine is by Lawn Fawn.

The center tag uses that great cool santa from Ellen Huston’s Tis the Season stamp set. A little copic coloring, a pom-pom and a few jingles bells finished this tag off. I’ve got a variation on this tag further down the post.

The right-hand tag is my CASE of Nichol McGuirk’s super cute No Peeking tag, using Mama Elephant stamps and Pretty Pink Posh dies and sequins.

3 tickets

Front back ticket

I really enjoyed making these ticket tags! Instead of making punching holes and using twine, I decorated some small clothespins (washi tape, super easy) and used those for attaching my tickets.  These tickets are only 2″ long, so tiny die cuts, gems and stickers look right at home.

Tree tags

Punched tree shapes let me make use of all of those sequins and enamel dots I seem to be hoarding 😉

Santa pocket tag

Here’s that santa again, but this time the tag has a built-in pocket (I know it’s hard to see!). I made this pocket tag by die cutting a folded piece of card stock, with the left edge of the die just off of that fold when I ran it through my Big Shot. I secured the edges of the tag with 1/8″ Scor-tape, and it will juuuuust fit a gift card in that pocket, so using strong adhesive is key.

Round ombré tags

These round tags use stamps and a die from Papertrey Ink’s Tinsel and Tags kit. I created an ombre look with Avery Elle pigment inks.

More tix

Merry Christmas Eve!

Peep of the Week: Farmer’s Market Matchbox

Author Note: my matchbox was a Peep of the Week for August 22, 2014!

My entry for Power Poppy’s Peep of the Week is a little paper matchbox that features the Power Poppy Farmer’s Market stamp set.  Look at those gorgeous veggies!

Photo Aug 15, 1 29 53 PM

The matchbox opens up to reveal a tiny glassine envelope full of seeds. You could, of course, put other small/flat gifts in there.  Maybe a set of labels or stickers? Or perhaps a card-making friend would love a handy box full of Vintage Seed Packet stamps?

Photo Aug 15, 1 30 49 PM

I used the new Matchbox Die from Tim Holtz to cut the wrapper from Recollections 110lb card stock (I’m really liking this heavier paper that I can just grab from Michaels with a coupon. Coloring on it with my Copics has been a pleasure). I cut the little drawer from green Bazzil card stock.  I assembled the bottom part right away, but I wanted to stamp and color the wrapper before assembling.

Photo Aug 15, 1 28 28 PM

The swiss chard was a blast to color—I chose to make them look like Bright Lights variety, which can have veins of shocking pink or bright yellow. Shading the eggplant was new to me, and I’m still not sure I have the hang of it. The biggest challenge was coloring the  turnips! I tried tip-to-tip blending (V04 on V000) for the first time to get the effect I wanted:  purplish tops that shaded to creamy bottoms. My dad had brought us a few garden tomatoes when he visited, so I lined them up for some inspiration as well.

Photo Aug 15, 1 28 54 PM

I think that the tiny sentiments in the Farmer’s Market set are so great.  While they are the perfect fit for the sign that tops the cauliflower stamp, they are also just the right size for tags and other small applications.  I used “EAT your veggies,” but I predict that “Just for you” will see a lot of use too.

To finish my little seed packet, I stamped just a sprig from the Springtime Love set onto the tiny tag and then colored and wrote out the label. Just a bit of twine around the package, and my little gift of cilantro seeds is tucked in and ready to go!

IMG_1466

I’m popping one last picture down here, to show the scale of this matchbox.  My husband was surprised that it was much smaller than it looked in photos!

Photo Aug 16, 12 29 53 PM